
Chargeline
from download to your own charging log app.
Chargeline is an Android and iOS app that logs every charge of the phone and draws it as a Night Strip. This guide takes you from the download to a branded build in the stores, step by step. Read it top to bottom the first time; after that, press / and search.
01What you bought
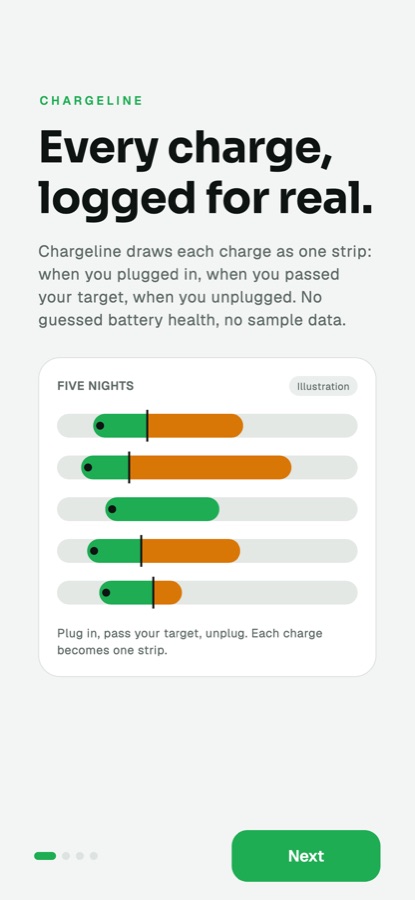
Chargeline is a complete, white-label mobile app source code plus an optional small server. The app logs when the phone is plugged in and unplugged, shows one row per day (the Night Strip: when the phone charged and how long it stayed above a charge target), warns you when a target percent is reached, keeps a capacity log, and sells a Pro tier through in-app purchases. Every number comes from an event or a value the phone reports. No sample data ships.
Chargeline is a charging log. It does not change how the phone charges and it makes no claims about battery condition. Please describe your app the same way in your store listing.
| Part | Folder | What it is |
|---|---|---|
| Mobile app | app/ | Flutter project for Android and iOS. Works fully offline, with no server. |
| Server (optional) | server/ | Node.js backend with an operator console: change the paywall, features, announcements, force update and habit cards without a new build; optionally confirm purchases with the stores. |
| Contract | contract/CONTRACT.md | The three API calls between app and server, with example JSON. |
02Folder map
| Path | What is inside |
|---|---|
app/lib/brand.dart | App name, tagline, accent colour, fonts, support/privacy/terms links, default store product ids, server address. The one file for rebranding. |
app/lib/src/ | Dart code: core/ (sessions, config, CSV), services/ (purchases, notifications, config client, ping), ui/screens/ (Live, Night Strip, Week, Capacity, Learn, Settings, Paywall, Setup Doctor, Onboarding, Update). |
app/android/ | Android project and the Kotlin code: PowerReceiver.kt, TargetService.kt, MainActivity.kt. |
app/ios/ | iOS project and Swift code: LogChargeEventIntent.swift (the Shortcuts action), NativeBridge.swift. |
app/assets/fonts/ | Sora and Geist fonts with their licence texts. |
app/tool/make_icon.py | Script that draws the app icon. |
app/test/ | 77 automated tests. |
server/src/ | TypeScript server: app.ts (routes), purchases/ (App Store and Google Play checks), admin/manifest.ts (what the console shows). |
server/packages/admin-kit/ | The operator console (MIKODES Admin Kit), licensed with this item. |
server/.env.example | Every server setting, with comments. |
server/Dockerfile | Container build for the server. |
03How it fits together
The app works alone. The server is optional: the app asks it for settings, can report an opt-in count, and can send a purchase proof for checking. Arrows point from the part that calls to the part that answers.
04Quick start (about 20 minutes)
Flutter runs natively on Windows: use PowerShell for the flutter commands and Android builds (iOS builds need a Mac). For the server, either install Node.js 22.12+ for Windows and use PowerShell (replace cp .env.example .env with Copy-Item .env.example .env; there is no openssl by default, so use WSL or any random 64-character hex string), or run the commands in WSL 2 (Ubuntu) or Docker. macOS and Linux users can ignore this note.
- Install Flutter 3.41 or newer (see Requirements) and run
flutter doctoruntil it shows no red items for the platform you want. - Run the app. In a terminal:
Connect an Android phone with USB debugging on, or start an iOS simulator.cd app flutter pub get flutter test flutter run - Run the server (optional).
Opencd server cp .env.example .env openssl rand -hex 32 # paste the result after ADMIN_SECRET_KEY= in .env npm ci npm run build npm starthttp://localhost:8787/adminand follow First sign-in. - Rebrand. Follow Rename and rebrand: name, package id, bundle id, icon, colours.
- Create the store products and put their ids in the app or the console: Store products.
- Build and publish: Release builds and signing.
A read-only demo of the operator console: Email: demo@chargeline.demo · Password: chargeline-demo-2026 (read-only demo account)
05AI tools
AI tools were used to assist with parts of the code, documentation and graphics of this item. The finished product contains no AI features and calls no AI service.